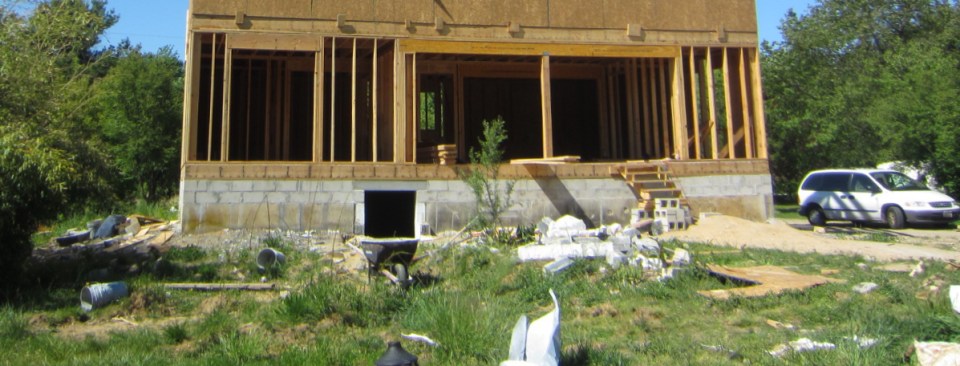
May 19. Here is a pic showing the clutter behind the house. Lumpy yard left by the excavator, bamboo growing on the west side, concrete blocks from the foundation repair.
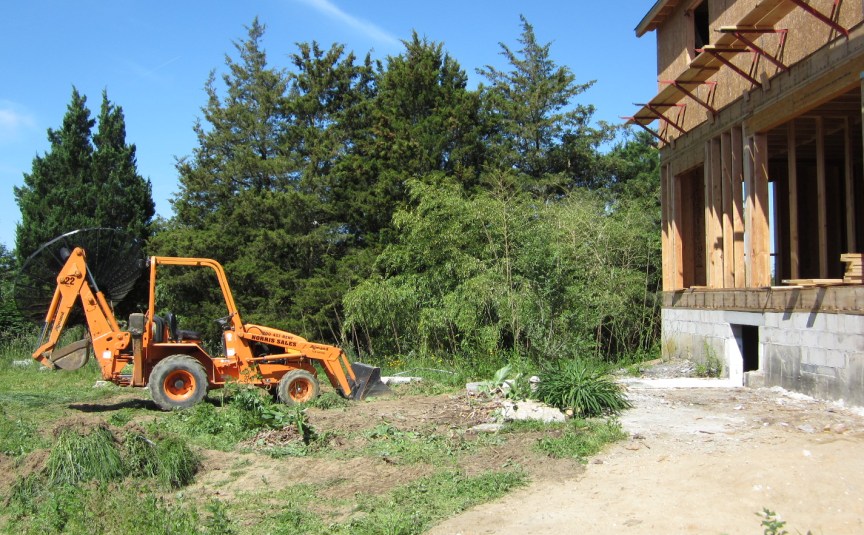
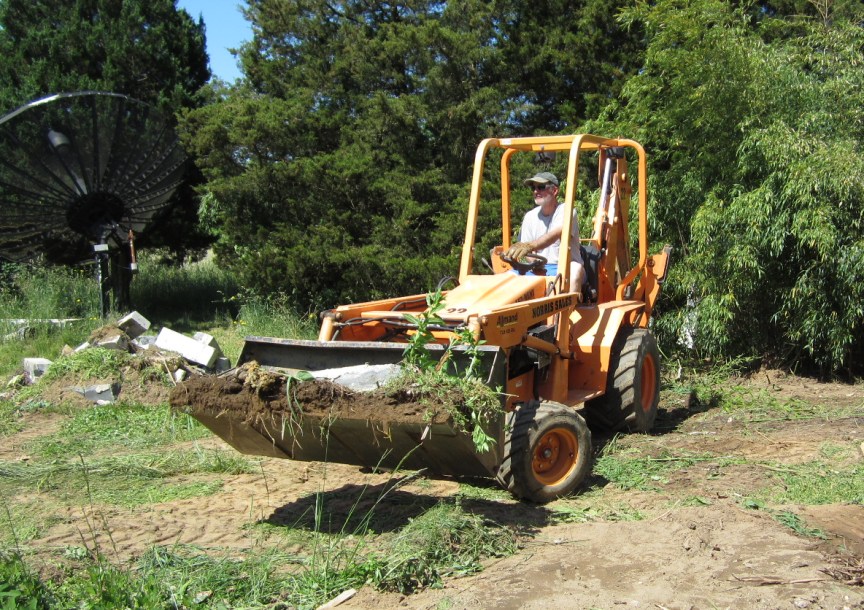
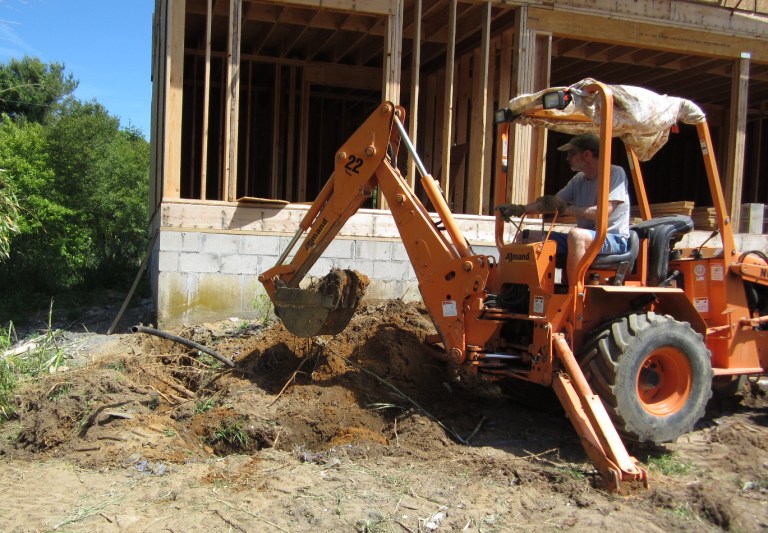
I rented a dumpster and a backhoe. The first job: clean up around the house.
More clean up:
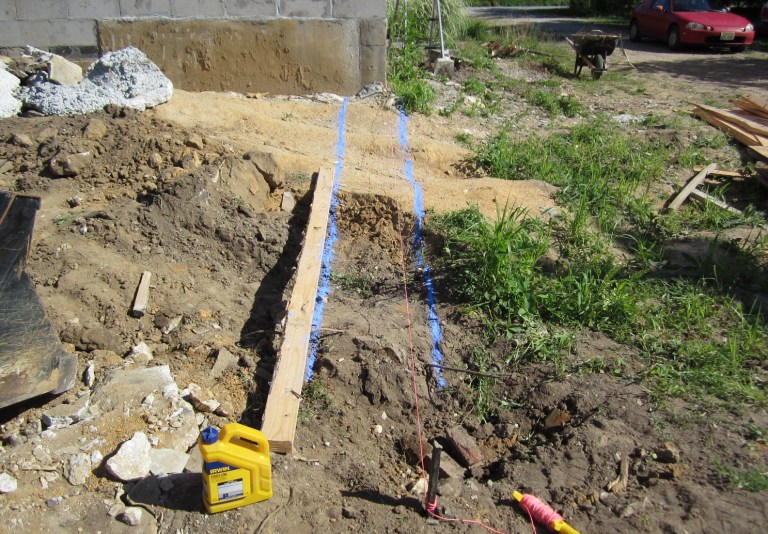
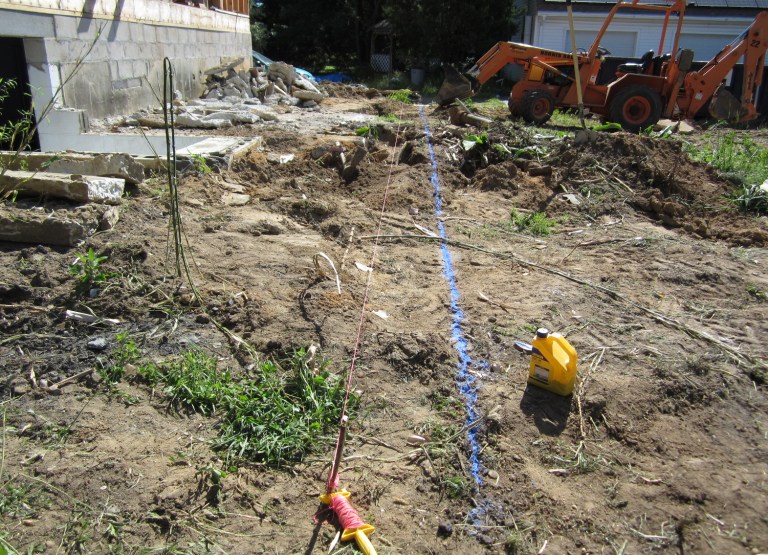
May 20. I marked lines on the ground with blue chalk, using a mason's line and 2x4 to guide me. Here are the lines for the east trench:
And a line for the south trench:
Digging:
You can see the Revenge of the Tree, Part I, in the west trench. Lots of roots there, and the sump pump pipe.
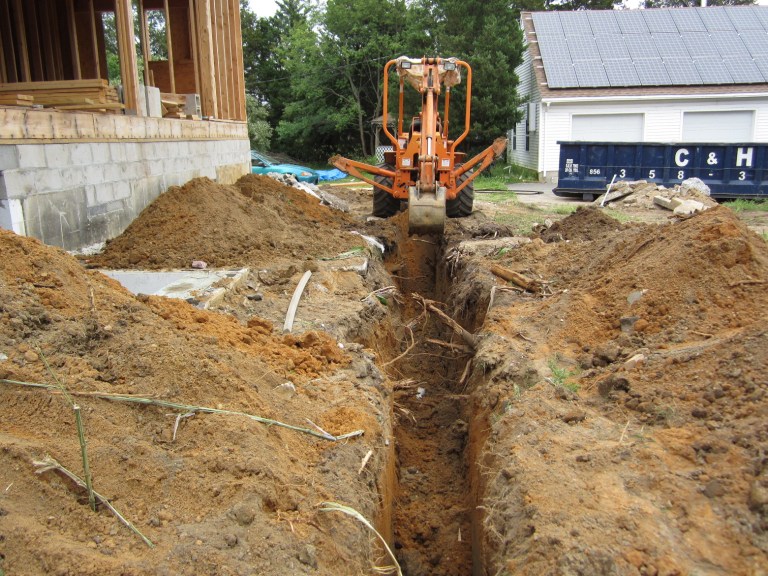
More digging:
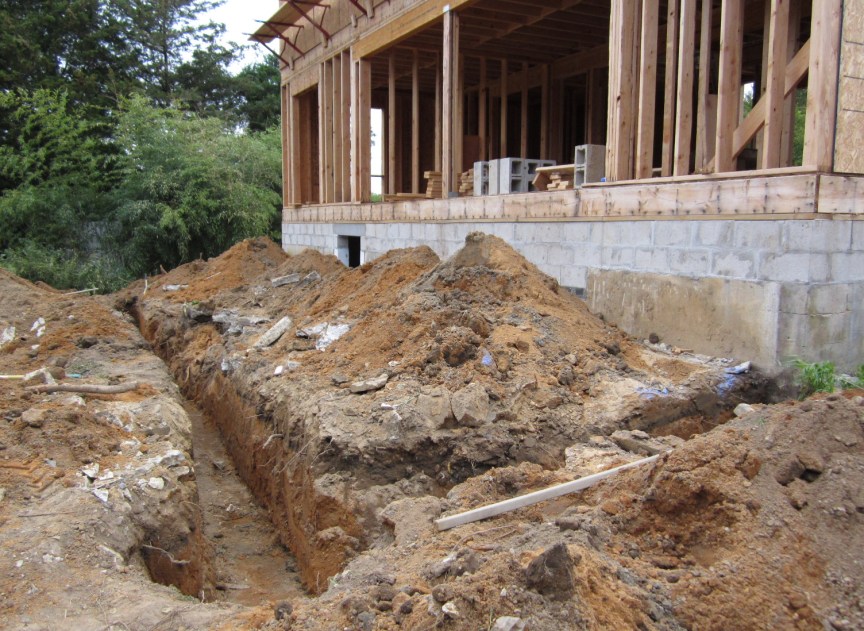
You can see Revenge of the Tree, Part II in the middle of the trench. More roots. And as I dug, I pulled on the roots that didn't snap. They loosened the earth which made the walls fall in to some extent. We had to go in with shovels and dig it out. Great fun.
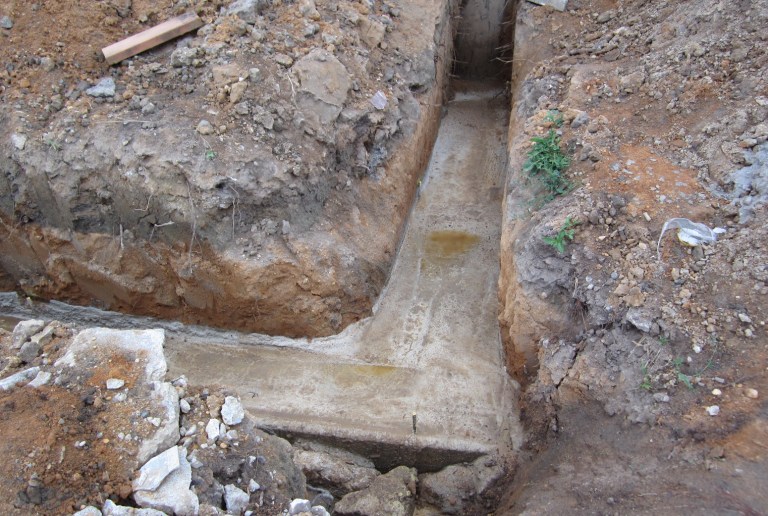
Trench dug:
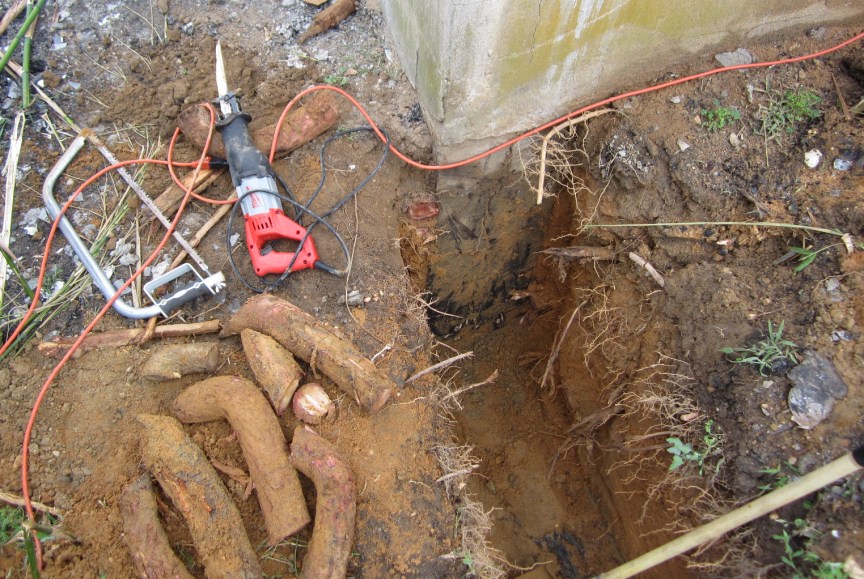
May 21. I took my new Sawzall over to the west trench, filled with roots near the house foundation:
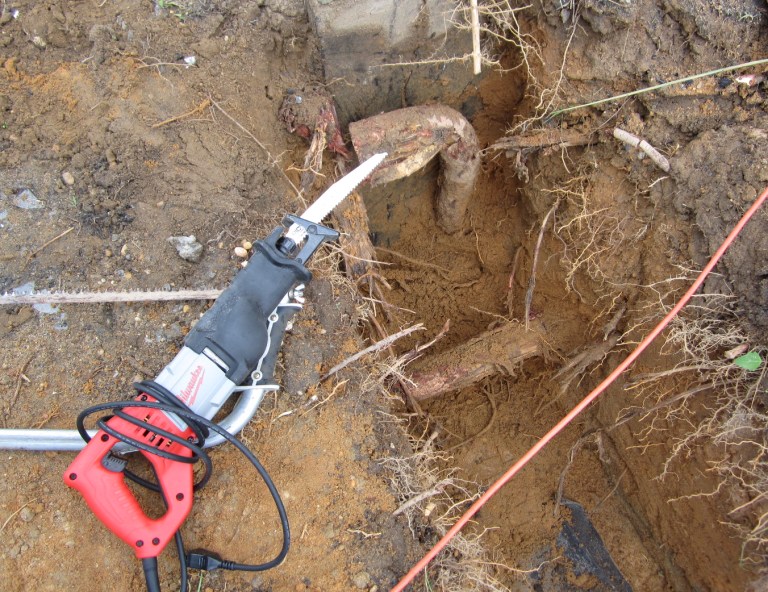
After clearing what I could with the shovel, I cut each root only to find another root underneath. I finally cut them all and cleared the trench to the wall of the house:
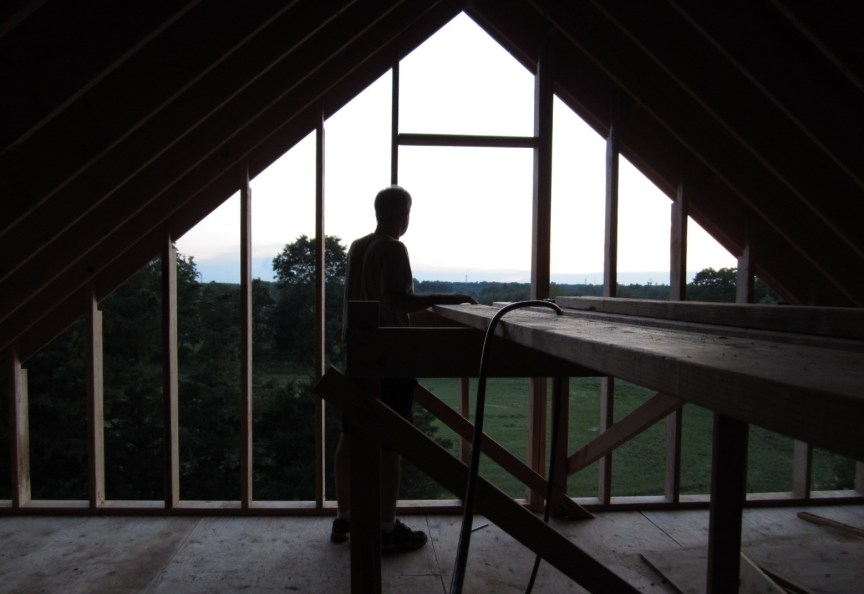
May 22. Some rain left some puddles of water in the trench, so we built the west gable end wall:

From the inside looking out. Nice view:
May 23. Playing in the mud, I set up four batter boards. I pulled four mason's lines to define the corners of the sunroom foundation:

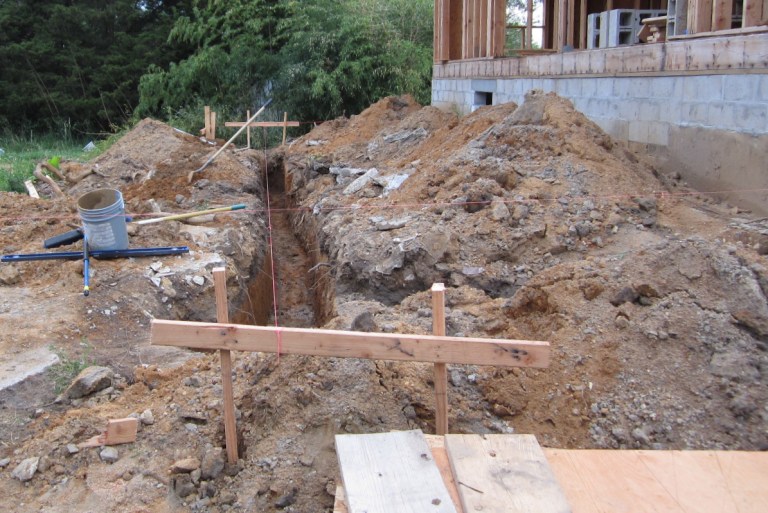
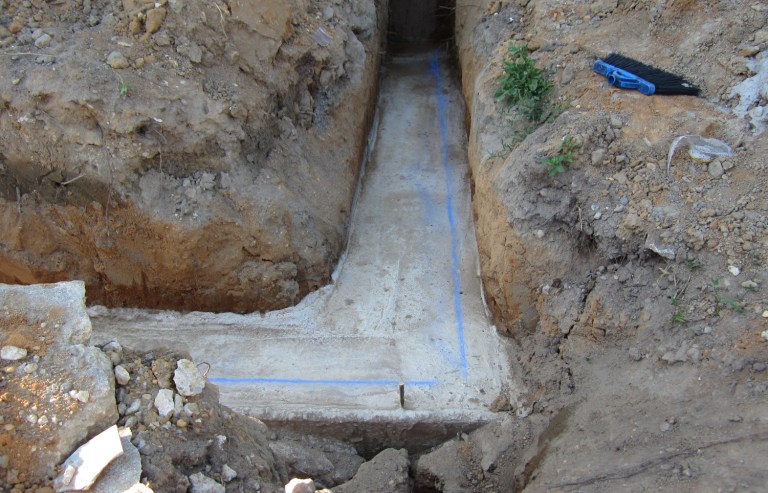
May 24. The trench is ready for inspection. I put a piece of 2x10 in trench where it went off course, to define a 16" wide portion:
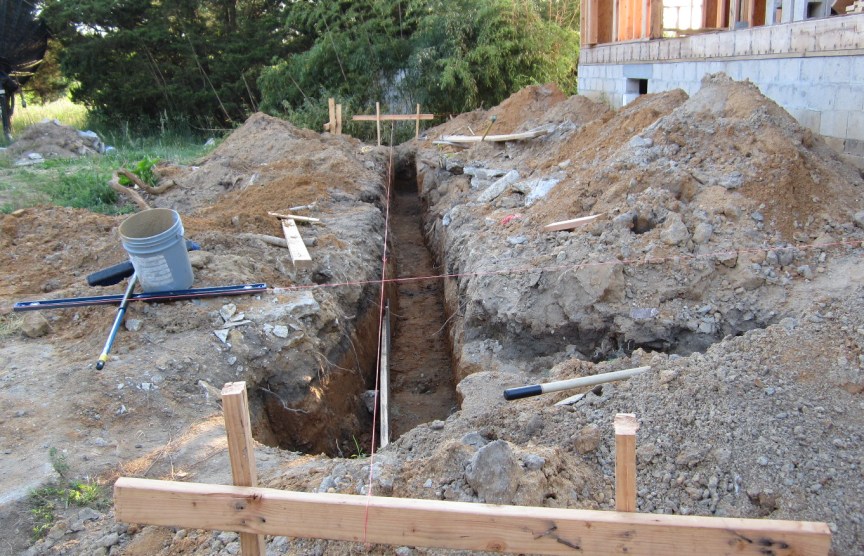
May 25. The trench is approved:
May 26. We built the east gable wall:

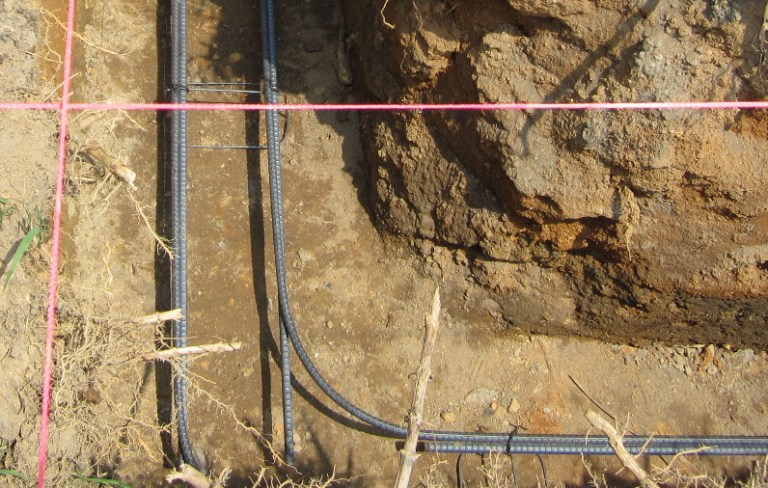
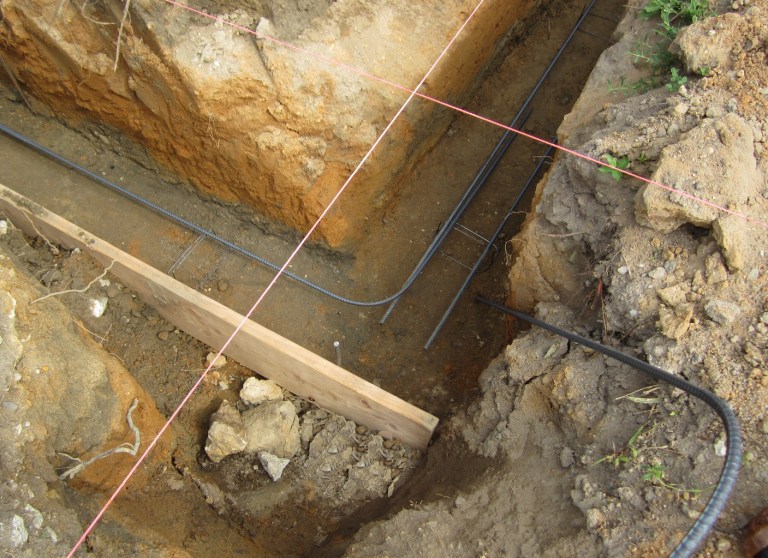
Also, I hammered in 2-foot rebar stakes every 5 feet along the trench and used a long level (a 2-foot level taped to a straight piece of square-tube aluminum) to define a measuring points to make sure we get enough concrete. Then we scraped the trench a little more to try to level it. Hard work on a hot, humid day.
May 27. A little more adjusting of the the trench sides as rebar goes in the trench. Here is the south west corner. The rebar is tied to wire supports called chairs to put it in the lower third portion of the concrete. The rebar is doubled up where it overlaps and it has to bend around the corners.
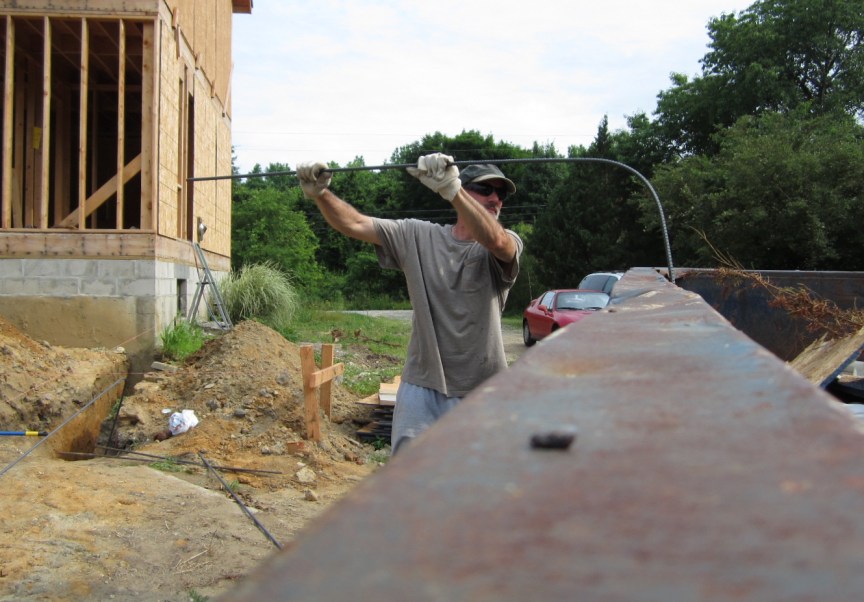
How do you bend steel rebar? With your bare hands, of course, or with gloves and a dumpster:
Rebar going in the south east corner:
Rebar in the long south trench, ready for concrete:

Concrete in the trench:
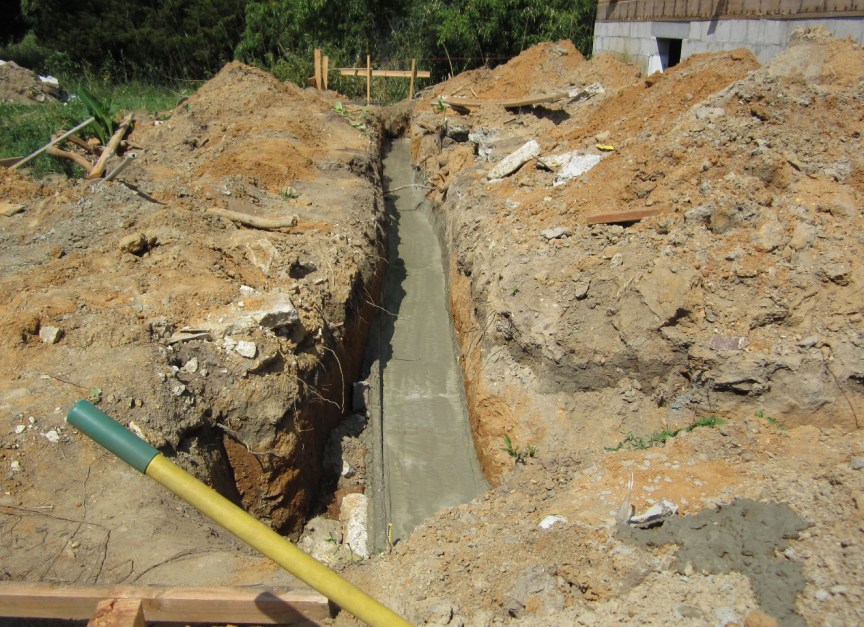
There was a lot of variation in trench depth and width. I calculated about 2.8 cubic yards of concrete would yield a minimum 9 inch depth at the most shallow point in the trench. I ordered 3 cubic yards. We had to pull a lot of it westward with shovels. The truck was able to pour about a third of the way down the south trench, and back towards the truck. Pulling a yard of concrete was heavy work that had to be done quickly.
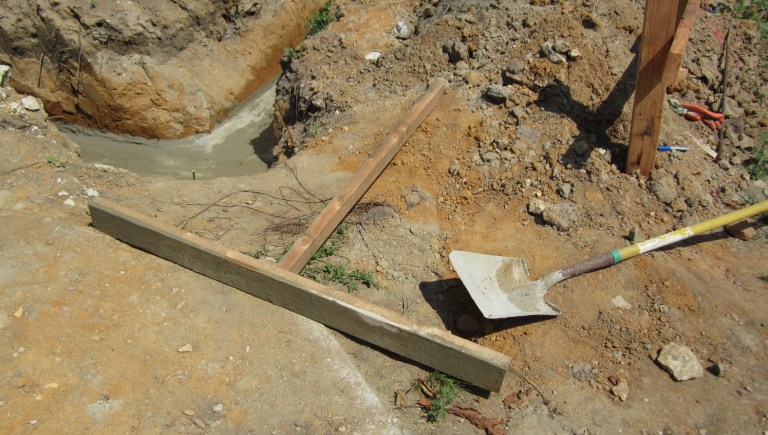
Concrete tools:
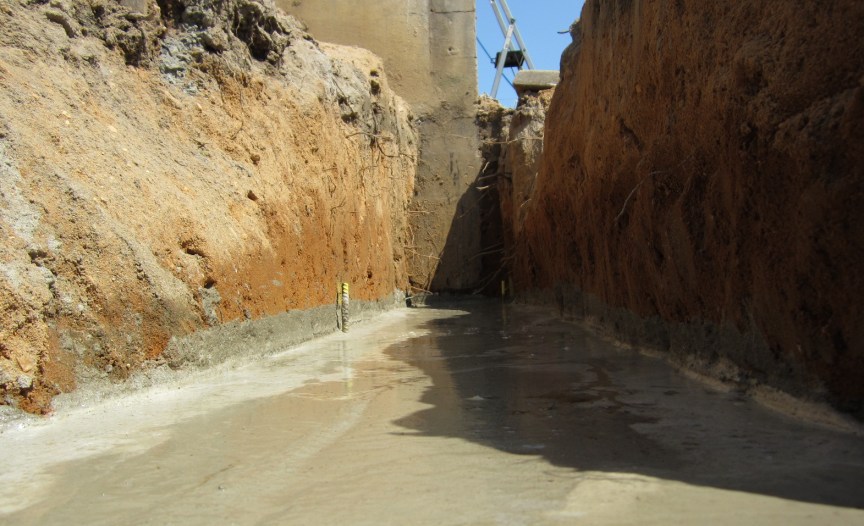
After we got the concrete level, we worked shovels in all along the footing to make sure there were no air bubbles. Then I went over the whole surface with the 2x4 on a stick, to push down the gravel in the mix, to smooth the surface.
Here is the east trench. You can see the stakes I put it to define footing height. I spray painted them bright yellow to be able to see them easily.
May 30. Dry concrete:
And a little cement mixer from Harbor Freight to mix mortar:

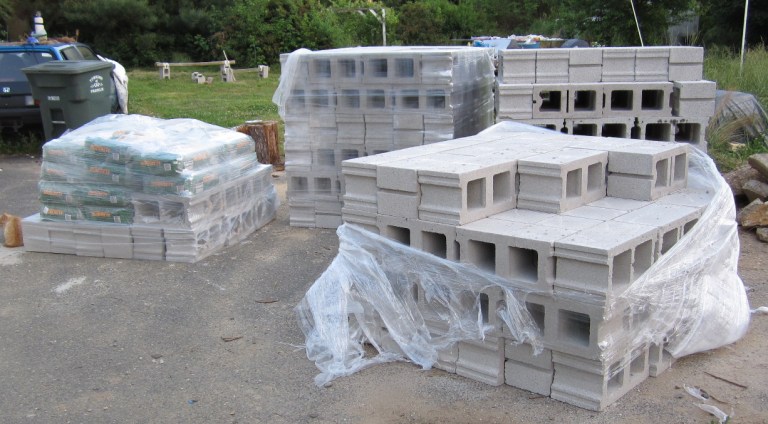
May 31. 350 concrete blocks and 20 bags of mortar arrive. About 50 had already been moved to the footing when I took this picture:
Before laying any blocks on the footing, I found the corners of the future wall using the mason's lines on the batter boards and a plumb bob. With the corners marked, I snapped chalk lines to define the outer edge of the wall:
We placed the first course of blocks dry, to make sure of the block spacing (3/8" between each block for mortar):

I marked the mortar joint positions by placing a piece of wood 3/8" thick at the joint and spraying a yellow paint mark. We are ready for mortar.
June 2. We lay three courses of block on the south footing and two courses in the short legs:

June 3. To join the new wall to the old foundation, I drilled a 5/8" diameter hole in the old wall with a hammer drill equiped with a 6" drill bit. This picture shows a one foot long piece of rebar in the hole:
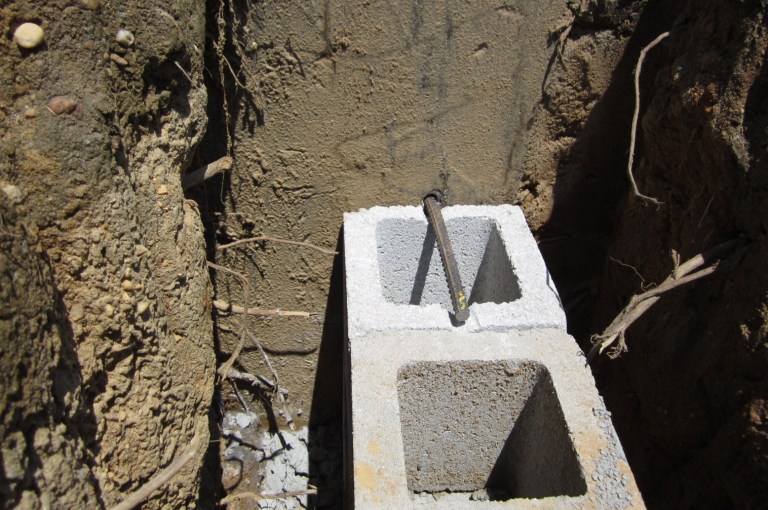
I epoxied the rebar in the hole. The piece of bar sticking out will be mortared into the block when the next course goes on. I'll add one of these joiners every other course.
We stopped after finishing 6 courses on the south footing:
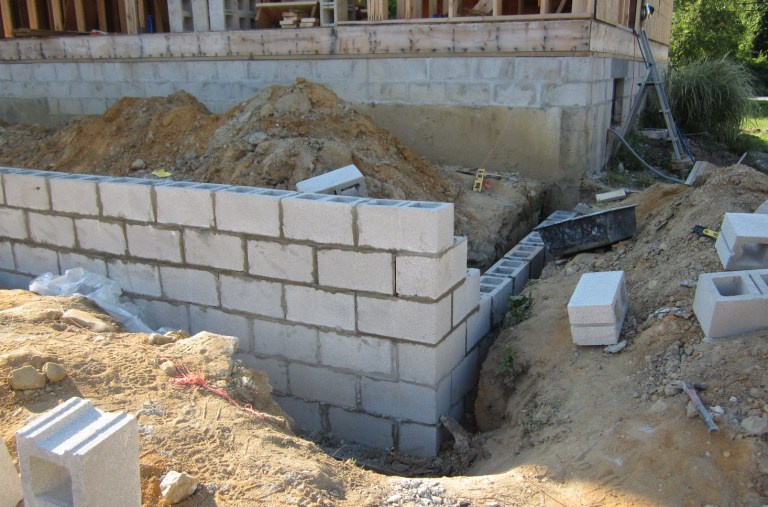
June 5. The south wall is done:

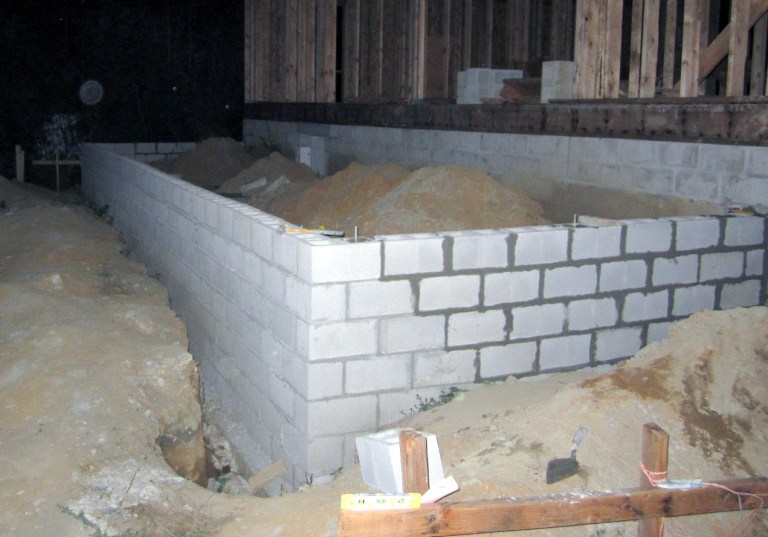
June 6. Working on the west wall:

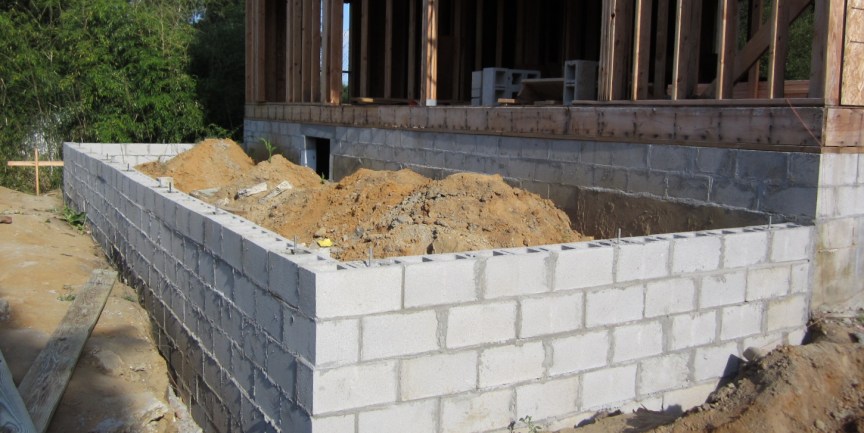
June 7. The wall is done. We worked until about 9 PM, set a few J-bolts into the wall. You can see two in this picture:
June 8. We set all the J-bolts.
June 9 and 10. Sill plate seal (pink plastic foam) and sill plate:

Next: Sunroom.